Whether you’re enjoying a moonlit swim or simply taking pleasure in the serene glow of an illuminated pool, proper functioning pool lights are indispensable for a safe and enjoyable swimming experience. However, even the most durable pool lights can occasionally encounter issues, plunging your nighttime swims into darkness. Fear not, as with a little knowledge and guidance, you can easily diagnose and fix most pool light problems yourself. This comprehensive guide will equip you with the step-by-step instructions and essential tips to restore brilliance to your pool and ensure a sparkling swim at any hour.
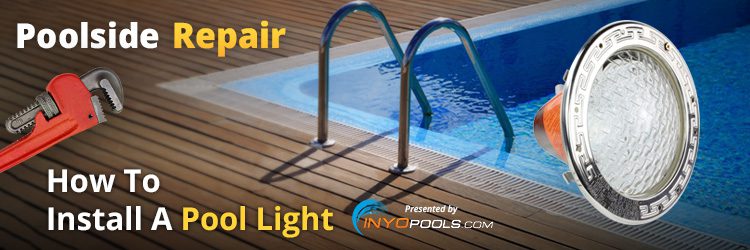
Image: www.inyopools.com
Understanding Pool Lights: The Spark of Illumination
Pool lights are designed to withstand the unique challenges of an aquatic environment, shrouded in waterproof housings and outfitted with specialized bulbs that emit light underwater. These fixtures typically feature a niche installed in the pool wall, accommodating the light’s housing and providing a secure anchor. Before embarking on any repair endeavors, let’s acquaint ourselves with the key components of a pool light:
- Light Housing: The housing encloses and protects the light’s internal components, ensuring watertight integrity.
- Bulb: The bulb, either incandescent, LED, or halogen, is the heart of the light, responsible for generating illumination.
- Gasket: The gasket, a rubber seal, ensures a watertight seal between the housing and niche, preventing water intrusion.
- Lens: The lens, made of glass or plastic, is designed to focus and distribute light underwater while withstanding water pressure.
Troubleshooting Common Pool Light Issues
Now that we’ve gained an understanding of the anatomy of a pool light, let’s delve into the common ailments that can afflict these underwater illuminators:
-
Lack of Power: A faulty power supply is often the culprit when a pool light refuses to illuminate. Begin by examining the circuit breaker panel to ensure that the dedicated circuit for the pool light is not tripped. If the breaker is tripped, reset it and observe if the light powers on.
-
Faulty Bulb: A malfunctioning bulb is another prevalent issue. Replace the bulb with a compatible one, ensuring it’s the correct wattage and type for your pool light. If the new bulb doesn’t illuminate, proceed with further troubleshooting.
-
Water Intrusion: Water leaking into the light housing can short-circuit the electrical components. Inspect the gasket and lens for signs of damage or wear. Replace any damaged seals and ensure the lens is firmly seated in the housing.
-
Loose Wiring: Over time, vibrations and movement can loosen electrical connections within the light fixture. Tighten any loose wires, ensuring secure connections. If the wiring appears damaged or corroded, seek professional assistance to avoid electrical hazards.
-
Faulty Transformer: In certain pool light systems, a transformer converts line voltage to a lower voltage suitable for the light. A faulty transformer can disrupt the power supply to the light. If you suspect a transformer issue, consult a qualified electrician for proper diagnosis and replacement.
Step-by-Step Repair Guide
To remedy the aforementioned pool light ailments, follow these comprehensive repair steps:
-
Safety First: Always disconnect power to the pool at the circuit breaker panel before commencing any repair work.
-
Remove the Light Fixture: Locate the screws or bolts securing the light fixture to the niche and carefully remove them. Gently pull the fixture towards you, taking care not to damage the wiring or niche.
-
Inspect the Bulb: Examine the bulb for any visible signs of damage or burnout. Replace the bulb if necessary, ensuring it matches the wattage and type specified for your pool light.
-
Check the Gasket and Lens: Inspect the rubber gasket for cracks, tears, or deformation. Replace the gasket if damaged. Examine the lens for chips or cracks and replace if necessary.
-
Tighten Electrical Connections: Check the wire connections for any loose or corroded terminals. Tighten any loose wires securely. If the wiring is damaged, consult a qualified electrician for assistance.
-
Reassemble the Light Fixture: Carefully insert the pool light fixture back into the niche and secure it with the screws or bolts. Ensure the gasket is properly seated and the lens is firmly in place.
-
Restore Power and Test: Turn the power back on at the circuit breaker panel. Activate the pool light switch and observe if the light illuminates properly. If the issue persists, consult a qualified pool professional for further assistance.

Image: www.poolcontractor.com
Maintenance Tips for Lasting Pool Light Illumination
With a little care and attention, you can prolong the lifespan of your pool lights and ensure they continue to illuminate your nighttime swims:
- Regular Inspections: Schedule regular inspections of your pool lights to identify and address any potential issues promptly. Check for water leaks, corrosion, and loose connections.
- Proper Bulb Selection: When replacing bulbs, always opt for the correct wattage and type specified for your pool light. Avoid using overly powerful bulbs, as this can overheat the fixture and shorten its lifespan.
- Clean the Lens: Regularly wipe the pool light lens with a soft cloth to remove dirt and algae buildup, ensuring optimal light output.
- Keep the Water Balanced: Maintain proper water chemistry to prevent corrosion and scaling on the pool light’s components.
- Hire Professional Assistance: If you encounter complex electrical or mechanical issues beyond your expertise, don’t hesitate to seek assistance from a qualified pool professional. Trained technicians possess the knowledge and tools to diagnose and repair pool light problems safely and efficiently.
How To Fix A Pool Light
Conclusion
By embracing the insights and instructions outlined in this guide, you’re now equipped to tackle most pool light repair challenges with confidence. Remember to prioritize safety by always disconnecting power before performing any maintenance or repair tasks. With regular inspections, timely bulb replacements, and proper maintenance practices, you can keep your pool lights shining brightly, illuminating your nighttime swims and enhancing the overall ambiance of your aquatic oasis.
