The license plate light, a small but significant component of your vehicle, illumines your license plate, making it visible to law enforcement and other drivers. Driving with a malfunctioning license plate light can result in fines or even legal consequences, so fixing it promptly is crucial.

Image: www.optimaforums.com
In this comprehensive guide, we’ll delve into the causes of license plate light failure, explore a step-by-step repair process, and provide valuable tips to ensure your vehicle complies with legal requirements.
What Causes License Plate Light Failure?
Understanding the common causes of license plate light failure can help you prevent future issues. Here are some factors:
- Bulb Burnouts: Just like other vehicle lights, the license plate light bulb can simply burn out over time.
- Wiring Issues: Corrosion, loose connections, or broken wires can disrupt the electrical current needed for the light to function.
- Moisture: Water leaking into the light housing can damage internal components, including the bulb and wiring.
- Lens Damage: Cracks or scratches on the license plate light lens can let in moisture or dirt, causing electrical problems or diminished light output.
Step-by-Step Repair Process
Fixing a license plate light is a relatively straightforward process that can be completed in a few steps:
1. Gather Materials and Tools
- Replacement bulb (check your owner’s manual for the correct type)
- Screwdriver (Phillips or flathead)
- Gloves (optional but recommended)
- Clean rag or microfiber cloth
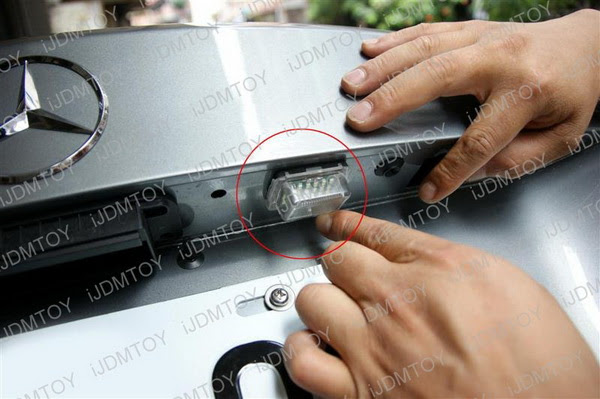
Image: masbrunno.blogspot.com
2. Access the License Plate Light Assembly
- Open the trunk or rear hatch of your vehicle.
- Locate the license plate light assembly, usually mounted on the trunk or tailgate.
- Use the screwdriver to remove the screws holding the assembly in place.
3. Replace the Bulb
- Carefully twist and pull the old bulb out of its socket.
- Avoid touching the new bulb with your bare hands as the oils from your skin can shorten its lifespan.
- Insert the new bulb firmly into the socket, twisting it clockwise until it’s secure.
4. Check the Wiring
- Inspect the wires connected to the license plate light assembly for any damage or loose connections.
- If you find any loose wires, gently reconnect them and use electrical tape to secure them.
- If you notice any damaged wires, replace them before reattaching the assembly.
5. Reattach the Assembly
- Use a clean rag or microfiber cloth to wipe down the contact points on the light assembly and the vehicle.
- Insert the assembly back into its designated slot and tighten the screws.
- Double-check the screws to ensure they are snug.
6. Test the Light
- Turn on your headlights to test the license plate light.
- If the new bulb still doesn’t illuminate, check the fuses or consult a qualified mechanic.
How To Fix License Plate Light
Additional Tips for Maintaining License Plate Lights
- Regular Inspections: Regularly check your license plate lights to identify any potential issues early on.
- Cleaning: Keep the license plate light lens clean to ensure maximum light output.
- OEM Parts: Use original equipment manufacturer (OEM) replacement bulbs for the best fit and performance.
- Professional Assistance: If you’re uncomfortable with electrical repairs, seek assistance from a qualified mechanic.
By following the steps outlined above and adhering to these additional tips, you can keep your license plate light in good working order, ensuring compliance with legal requirements and peace of mind while driving.
