Every car owner can agree on the convenience, practicality, and safety of being able to control the position of their windows with the flick of a switch. This ability is made possible by the window regulator, a complex mechanism concealed within the door that mechanically cranks the glass up and down. Unfortunately, this mechanism can occasionally malfunction, leading to a window becoming stuck, or operating erratically.
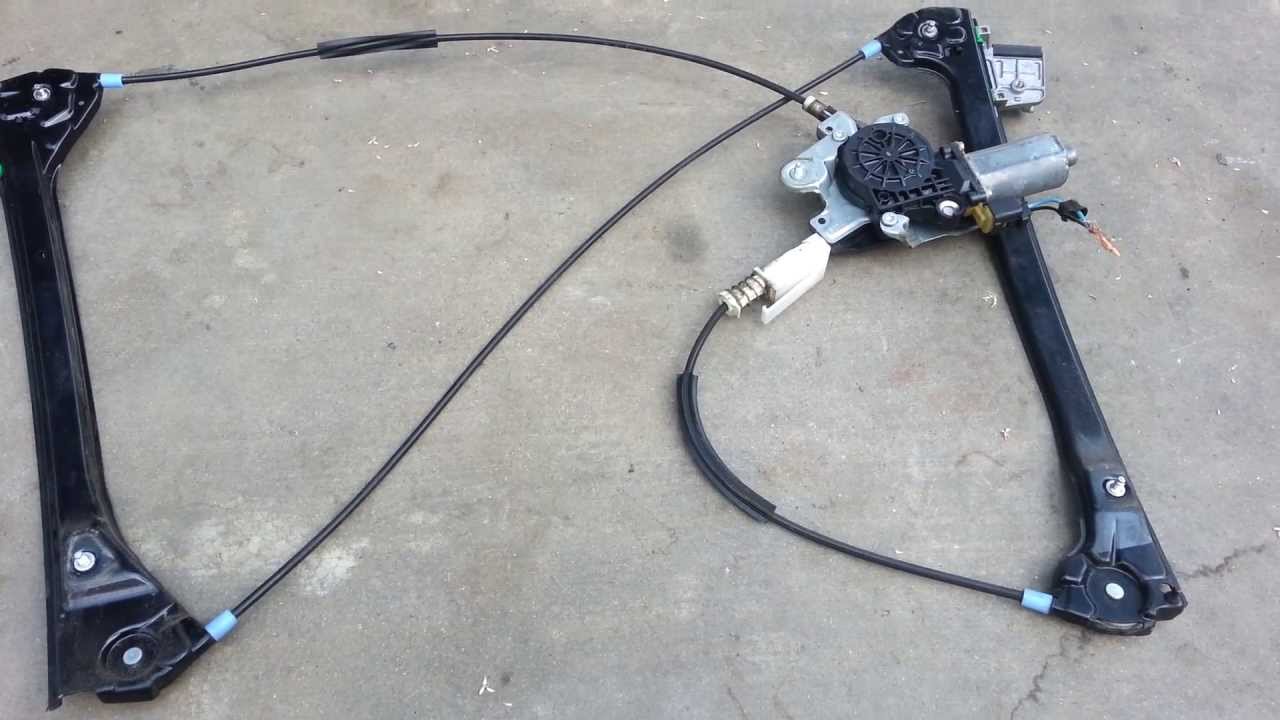
Image: www.youtube.com
Although complex in design, window regulators are not beyond the DIY abilities of most car owners to repair. As a frequent point of failure, faulty cables are a relatively common problem. In this extensive tutorial, we will take a closer look at the intricacies of window regulator cables, provide step-by-step instructions on how to replace them, and explore some additional repair and maintenance tips to keep your windows working smoothly for years to come.
Understanding Window Regulator Cables
Window regulators employ a variety of mechanisms to transfer rotational motion from a motor into the linear movement needed to raise and lower the window. Cables are one of the most common types of such mechanisms. They consist of a strong, flexible steel cable wound around a drum, powered by an electric motor. As the motor spins, the cable is either wound or unwound, causing the window to move.
Window regulator cables undergo significant stress during operation, so they can deteriorate over time. Wear, corrosion, fraying, or snapping of the cable can all lead to window regulator failure. It is therefore essential to inspect and replace cables that show signs of damage to avoid further issues down the road.
Tools and Materials You’ll Need
Before you start on the repair, gather the necessary tools and materials. Here’s a list of what you’ll need.
- Window regulator cable repair kit, specific to your car model
- Socket or wrench set
- Phillips and flathead screwdrivers
- Needle-nose pliers
- Electrical tape
- Penetrating oil or lubricant
- Center punch
- Hammer
- Drill or large nail
- Safety glasses

Image: www.ebay.com
How To Fix A Window Regulator Cable
Step-by-Step Repair Instructions
- Safety First: Park the car on a level surface, engage the parking brake, and disconnect the negative terminal of the battery to prevent accidental electrical shocks.
- Remove the Door Panel: Each car model has a slightly different method for removing the door panel, so consult your vehicle’s repair manual for specific instructions. Generally, you can start by removing the trim pieces and screws, then carefully detaching the panel itself.
- Identify the Window Regulator: With the door panel removed, you will have access to the inner workings of the door, including the window regulator. It is usually located behind the door panel, mounted to the door frame.
- Disconnect the Motor and Controls: Disconnect the electrical wires and plugs connected to the regulator motor. Remove the bolts or screws that secure the motor to the regulator assembly.
- Remove the Old Cable: Locate the old window regulator cable and carefully unhook it from the drum and the window glass. You may need to use needle-nose pliers or a thin screwdriver to help with this.
- Install the New Cable: Take the new cable and hook it onto the drum, following the grooves or slots provided. Ensure that the cable is wound in the correct direction, which may vary depending on your car model. Secure the cable to the window glass using the provided clips or bolts.
- Reconnect the Regulator Motor: Reinstall the regulator motor onto the window
